
Sorry. Yes. The thread will be boring for a little while. I'm picking up the lathe this week! Likely won't be long for me to have metal bobbin/pushrods. Then the torque tube. Then I'll be making the springs. So, over the next couple months, that will be the content of my posts. I am going to hold off on anything else until I have metal parts.
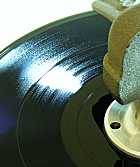
On a side note, I'm doing my first of three Presto 1D repairs. I am cloning the coils wothout issue. I'll be able to machine spare parts as well.
Re: Deep Grooves Mastering - Project Bladerunner
Cutting, Inventing & Innovating
Groove Graphics, VMS Halfnuts, MIDI Automation, Professional Stereo Feedback Cutterheads, and Pesto 1-D Cutterhead Clones
Cutterhead Repair: Recoiling, Cleaning, Cloning of Screws, Dampers & More
http://mantra.audio
Groove Graphics, VMS Halfnuts, MIDI Automation, Professional Stereo Feedback Cutterheads, and Pesto 1-D Cutterhead Clones
Cutterhead Repair: Recoiling, Cleaning, Cloning of Screws, Dampers & More
http://mantra.audio
-
EmAtChapterV
- Posts: 244
- Joined: Sun Jan 06, 2013 6:49 pm
- Location: Vancouver, BC
Re: Deep Grooves Mastering - Project Bladerunner
When you get to the point of making the U-shaped armature-balancing springs for a Presto 1D, I'd be interested in a set, plus a pair of 1D coils wound with flat wire. My record cutting has been on the backburner for two and a half years due to equipment failure and being tied up in other projects, and it makes me sad.
Re: Deep Grooves Mastering - Project Bladerunner
The springs.... Haven't considering making those since they aren't a part that wears like the stylus screw, mount, rubber damper and tiny screws for the damper. I was more concerned about those.
Flat? Really? For this? Um, ok. charge extra though.
The coils are no problem. I'll post a video soon. I can wind both coils on a cotinuous piece of wire unlike originals wound separately and then connected. I can make whatever dc resistance you want. I've cloned the bobbin so no worries if the old ones are cracked or broken or missing. I made a cool little rig to cook the coils. Simple. Less than $45 altogether. Maintains temp nicely and circulates air effectively. The plastic for the bobbins has a melting point well above what is required to cure the coil resin. Final seel with a strip of masking tape like the old days.
You do not have the required permissions to view the files attached to this post.
Cutting, Inventing & Innovating
Groove Graphics, VMS Halfnuts, MIDI Automation, Professional Stereo Feedback Cutterheads, and Pesto 1-D Cutterhead Clones
Cutterhead Repair: Recoiling, Cleaning, Cloning of Screws, Dampers & More
http://mantra.audio
Groove Graphics, VMS Halfnuts, MIDI Automation, Professional Stereo Feedback Cutterheads, and Pesto 1-D Cutterhead Clones
Cutterhead Repair: Recoiling, Cleaning, Cloning of Screws, Dampers & More
http://mantra.audio
Re: Deep Grooves Mastering - Project Bladerunner
Not bad for someone that's got no lathe experience
Well done Todd.
I know your not stupid but make sure you wear safety
Gloves and eye protection
My cousin has lost half a finger from doing metal work
On a lathe.
Well done Todd.
I know your not stupid but make sure you wear safety
Gloves and eye protection
My cousin has lost half a finger from doing metal work
On a lathe.
Re: Deep Grooves Mastering - Project Bladerunner
Rest assured, I'm following all safety precautions. That being said, you never know. Accidents happen. But, I'm being as safe as possible. I've done a bit of study before turning this beautiful machine on. I appreciate you concern very much!!!
Cutting, Inventing & Innovating
Groove Graphics, VMS Halfnuts, MIDI Automation, Professional Stereo Feedback Cutterheads, and Pesto 1-D Cutterhead Clones
Cutterhead Repair: Recoiling, Cleaning, Cloning of Screws, Dampers & More
http://mantra.audio
Groove Graphics, VMS Halfnuts, MIDI Automation, Professional Stereo Feedback Cutterheads, and Pesto 1-D Cutterhead Clones
Cutterhead Repair: Recoiling, Cleaning, Cloning of Screws, Dampers & More
http://mantra.audio
Re: Deep Grooves Mastering - Project Bladerunner
Wish there were more hours in a day. Learning to machine is awesome. Already, I am beginning to understand the complexities in making certain parts elegantly in one piece. Aluminum gets soft and when thin walled...
Cutting, Inventing & Innovating
Groove Graphics, VMS Halfnuts, MIDI Automation, Professional Stereo Feedback Cutterheads, and Pesto 1-D Cutterhead Clones
Cutterhead Repair: Recoiling, Cleaning, Cloning of Screws, Dampers & More
http://mantra.audio
Groove Graphics, VMS Halfnuts, MIDI Automation, Professional Stereo Feedback Cutterheads, and Pesto 1-D Cutterhead Clones
Cutterhead Repair: Recoiling, Cleaning, Cloning of Screws, Dampers & More
http://mantra.audio
Re: Deep Grooves Mastering - Project Bladerunner
Getting better at machining. Learned a couple tricks today. Like how to work on a part that has been center tapped and drilled already.
With aluminum, when the walls get thin, it gets very soft and you cant chuck up the part and work on the other end. If you start turning this way the tapped end gets crushed and destroyed in the chuck. I figured out a neat trick that lets me rechuck a tapped part and work the orher end today!
I also learned how to work on a slender end without it snapping off by using a follower.
Seems I have a natural understanding of machining!!!
You do not have the required permissions to view the files attached to this post.
Cutting, Inventing & Innovating
Groove Graphics, VMS Halfnuts, MIDI Automation, Professional Stereo Feedback Cutterheads, and Pesto 1-D Cutterhead Clones
Cutterhead Repair: Recoiling, Cleaning, Cloning of Screws, Dampers & More
http://mantra.audio
Groove Graphics, VMS Halfnuts, MIDI Automation, Professional Stereo Feedback Cutterheads, and Pesto 1-D Cutterhead Clones
Cutterhead Repair: Recoiling, Cleaning, Cloning of Screws, Dampers & More
http://mantra.audio
Re: Deep Grooves Mastering - Project Bladerunner
Getting closer!!! This is a solid piece of aluminum.
You do not have the required permissions to view the files attached to this post.
Cutting, Inventing & Innovating
Groove Graphics, VMS Halfnuts, MIDI Automation, Professional Stereo Feedback Cutterheads, and Pesto 1-D Cutterhead Clones
Cutterhead Repair: Recoiling, Cleaning, Cloning of Screws, Dampers & More
http://mantra.audio
Groove Graphics, VMS Halfnuts, MIDI Automation, Professional Stereo Feedback Cutterheads, and Pesto 1-D Cutterhead Clones
Cutterhead Repair: Recoiling, Cleaning, Cloning of Screws, Dampers & More
http://mantra.audio
Re: Deep Grooves Mastering - Project Bladerunner
Gotta hand it to you !
I thought you where going to stuff it up cause it's so
Small, look like I was wrong, well done great job !
I thought you where going to stuff it up cause it's so
Small, look like I was wrong, well done great job !

Re: Deep Grooves Mastering - Project Bladerunner
Looking good!! You must be very happy to have a lathe now!
If I may lend one potentially obvious piece of advice, it is this:
The tool geometry specific to each material makes a huge difference in how smoothly the cut is made. With correct tool geometry [for the material being machined], very little force needs to be used to achieve material removal.
I didn't think my machine could cut steel very well until I discovered the power of correct tool geometry, suddenly steel was totally feasible!
You do not have the required permissions to view the files attached to this post.
Re: Deep Grooves Mastering - Project Bladerunner
Understood. And, I know I have much to learn! Much.... Not trying to come off wrong. Just excited to get results.
Torque tube will be made in part in steel. But, the bobbin/push rod part that the coil wind on will be aluminum for reduced moving mass.
Thanks for the tip and keep them coming! I really appreciate the support.
Torque tube will be made in part in steel. But, the bobbin/push rod part that the coil wind on will be aluminum for reduced moving mass.
Thanks for the tip and keep them coming! I really appreciate the support.
Cutting, Inventing & Innovating
Groove Graphics, VMS Halfnuts, MIDI Automation, Professional Stereo Feedback Cutterheads, and Pesto 1-D Cutterhead Clones
Cutterhead Repair: Recoiling, Cleaning, Cloning of Screws, Dampers & More
http://mantra.audio
Groove Graphics, VMS Halfnuts, MIDI Automation, Professional Stereo Feedback Cutterheads, and Pesto 1-D Cutterhead Clones
Cutterhead Repair: Recoiling, Cleaning, Cloning of Screws, Dampers & More
http://mantra.audio
Re: Deep Grooves Mastering - Project Bladerunner
I wish I could show the part I just made. It is exactly like the plastic version! So much that I don't want to actually show it. So, I've nearly worked out a repeatable procedure for making the bobbin/push rod combo parts in aluminum. That is fantastic. I didn't expect to be here after only a couple days.
I also now a have a CNC!
I also now a have a CNC!
Cutting, Inventing & Innovating
Groove Graphics, VMS Halfnuts, MIDI Automation, Professional Stereo Feedback Cutterheads, and Pesto 1-D Cutterhead Clones
Cutterhead Repair: Recoiling, Cleaning, Cloning of Screws, Dampers & More
http://mantra.audio
Groove Graphics, VMS Halfnuts, MIDI Automation, Professional Stereo Feedback Cutterheads, and Pesto 1-D Cutterhead Clones
Cutterhead Repair: Recoiling, Cleaning, Cloning of Screws, Dampers & More
http://mantra.audio
-
Snug Music

- Posts: 299
- Joined: Sat Aug 15, 2015 5:23 pm
- Location: 28816 Stuhr / Moordeich LK Diepholz
Re: Deep Grooves Mastering - Project Bladerunner
opcode66 wrote:Getting closer!!! This is a solid piece of aluminum.
Hey Todd, ..
pretty good job! Since I can still learn a lot from you! smile
I would not have done better!
Scotty
I'm still not a professional, but I learn pretty fast. especially with my eyes and ears!
Re: Deep Grooves Mastering - Project Bladerunner
Hey Todd, here are two more things I'de like to share with you because they make my machining practice a lot more peaceful:opcode66 wrote:Thanks for the tip and keep them coming!
-This 'chuck spider' from a fellow on thingiverse is helpful for positioning parts during repetitious work: http://www.thingiverse.com/thing:281899. I scaled mine to 57.9% percent of the original .stl because this person made it for a 6" chuck. It very likely work for your chuck at 57.9%
Also, to avoid marring up your nice work, a simple solution that works for me is to cut a strip of aluminium beverage can and 'wrap' the part in it before putting it in the jaws. This works surprisingly well and never puts marks in the material! Alternatively, you can adhere little pieces to each of the jaws with double sided tape but this method is a little messy in time. the strips work well!
I'm excited for your updates! Keep up the great work.
You do not have the required permissions to view the files attached to this post.
Re: Deep Grooves Mastering - Project Bladerunner
I have the CNC setup nearly complete. I bought a license for Mach3 and have software now to convert stl's for Mach3. I realized that my CNC did not come with a handheld remote. So, I ordered a nice one for Mach3 today. The CNC is pretty nice. Solid. 4 axis. Self calibrating. Liquid cooled. Really convenient USB interface instead of parallel. Can't wait to get it running and making cutterhead body parts. I intend to contruct the body out of interlocking pieces instead being milled in one solid part. The things I'm doing in my design require this approach to make the milling possible and reasonable.
Other than that I've been reading a Basic Latheworking book. Haven't had time to get back on the metal lathe. But, I will on Monday. I'm going to make two more bobbin/push rod combos. Then, I will wind coils on them and buid out feedback transducers with them. I tested soldering the L pin linkage to the push rod end hole. Worked great!
Next items on the metal fabrication list are the torque tube, v spring and transducer springs. I've ordered some material I think will be perfect for all the springs. I know how I'm going to construct the torque tube. I did research today and discovered that I can make the tapered stylus hole using a specialty tapered reamer 1:20, 3mm smallest diameter. They cost about 120€ Yikes!!!!
After those parts are perfected, the procedures documented, and parts produced, I can construct a hybrid plastic/metal cutterhead and do some serious testing. Then, I'll work out the metal cutterhead body parts.
Finally, I wanted to say that I successfully rewound and calibrated a Presto 1D cutterhead. I can now work on these for anyone who needs one worked on. Even if others said it isn't repairable. I will be cloning parts later in 2016. Coils are no problem.
Keep you all posted.
Cutting, Inventing & Innovating
Groove Graphics, VMS Halfnuts, MIDI Automation, Professional Stereo Feedback Cutterheads, and Pesto 1-D Cutterhead Clones
Cutterhead Repair: Recoiling, Cleaning, Cloning of Screws, Dampers & More
http://mantra.audio
Groove Graphics, VMS Halfnuts, MIDI Automation, Professional Stereo Feedback Cutterheads, and Pesto 1-D Cutterhead Clones
Cutterhead Repair: Recoiling, Cleaning, Cloning of Screws, Dampers & More
http://mantra.audio
Re: Deep Grooves Mastering - Project Bladerunner
Wow, I haven't been here for a little while, was on tour and recording new material....
I must say I'm very impressed, this opens up so many doors for us cutting music, thank you for all the hard work and investment in your project!!
I'm really looking forward to this and follow all your videos religiously ....lol
Great Work Todd
Ben
I must say I'm very impressed, this opens up so many doors for us cutting music, thank you for all the hard work and investment in your project!!
I'm really looking forward to this and follow all your videos religiously ....lol
Great Work Todd
Ben

Re: Deep Grooves Mastering - Project Bladerunner
I basically am saying the same as above.
as i too have not been on here for some time.
things are looking AMAZING & EXCITING !!!
CHEERS!!!
as i too have not been on here for some time.
things are looking AMAZING & EXCITING !!!
CHEERS!!!
Cheers,
recordboy
recordboy
Re: Deep Grooves Mastering - Project Bladerunner
My spindle is now eccentric on my metal lathe. I rammed my compound in to my 3 jaw chuck. That was a dumb mistake.... I had a stop set but it moved. I was doing facing passes with the automatic feed and disengaging when I got close to the stop and then manually finishing. However, the lever for disengaging the automatic feed unscrewed and I didn't realize it. It came off in my hand. The sled pushed the stop and fucked up my spindle box. The spindle itself is ok. Replacing the bearings first. I'll see how things go after that.
Performing a tear down of the spindle box and and fixing this today. Also going to buy some aluminum square and round bar stock of the correct sizes (home depot is very limited) so I can make some parts to the exact size required.
I found one company that makes a taper reamer that will create a proper stylus holder. I am also looking into making the reamer myself.
Cutting, Inventing & Innovating
Groove Graphics, VMS Halfnuts, MIDI Automation, Professional Stereo Feedback Cutterheads, and Pesto 1-D Cutterhead Clones
Cutterhead Repair: Recoiling, Cleaning, Cloning of Screws, Dampers & More
http://mantra.audio
Groove Graphics, VMS Halfnuts, MIDI Automation, Professional Stereo Feedback Cutterheads, and Pesto 1-D Cutterhead Clones
Cutterhead Repair: Recoiling, Cleaning, Cloning of Screws, Dampers & More
http://mantra.audio
Re: Deep Grooves Mastering - Project Bladerunner
Ok, I disassembled the mini lathe. Extracted the spindle box. Tapped out the spindle. Tapped out the bearings. Tapped in new bearings. Tapped in the spindle. All tapping with a rubber mallet...
I'm going to make sure the spindle is tapped in true by taking run-out measurements with a dial bore gauge on a magnetic stand. I think that my accident simply wedge the spindle out of true in the bearings. I didn't need to replace them. And, certainly the spindle isn't bent. Though the bearing replacement ends up being unnecessary, I purchased upgraded bearings, so it ends up being worthwhile in the long run.
If you've never experienced this little slice of heaven, let me tell you that I wouldn't wish the task of swapping out bearing on my worst enemy. Certainly an activity that I am not wanting to engage in anytime soon. Gee whiz. That was a lot of mallet work!
Taking a quick break. Then I will reassemble the mini lathe. Overall, I'm glad this happened. It forced me to do a full strip down of the headstock. I now fully understand what is going on under the hood. It was just a magical turning box before this little accident. So, cheers!
Cutting, Inventing & Innovating
Groove Graphics, VMS Halfnuts, MIDI Automation, Professional Stereo Feedback Cutterheads, and Pesto 1-D Cutterhead Clones
Cutterhead Repair: Recoiling, Cleaning, Cloning of Screws, Dampers & More
http://mantra.audio
Groove Graphics, VMS Halfnuts, MIDI Automation, Professional Stereo Feedback Cutterheads, and Pesto 1-D Cutterhead Clones
Cutterhead Repair: Recoiling, Cleaning, Cloning of Screws, Dampers & More
http://mantra.audio