HOW TO MAKE YOUR OWN LACQUER BLANK DISCS
===============================
WHY I'M WRITING THIS: I was going to make laquer blanks myself using my research so far, which I've provided, below. But I just have too many irons in the fire. So, I hope other hobbyists can take what I've found so far, run with it, and supply everyone with alternate sources of laquer blanks.
IDEAL RESULT: It would be nice if different hobbyists with varying degrees of sophisticated home workshop equipment, would start making & providing varying degrees of quality of laquer recording blanks. From the best-possible-quality-at-home kind of thing with arc-welder-cut 1/16" thick circular aluminum metal disc bases and fairly even finishes, down to thick solid 1/10"-thick chipboard/cardboard-based discs with less perfect surfaces (but still a thick even coat, though it may be bumpy), and everything in between, for different price ranges, for different applications.
DISCLAIMER: "I am not TELLING you to do this. Nitrocellulose laquer is highly flammable if not handled wisely, so follow all warnings on the can." I.e. Work with AMPLE VENTILATION, don't leave the can in the hot sun to explode, don't leave windows closed in your 3rd bedroom while lots of blanks are drying so that when you enter & flip on the light switch the spark makes the room explode, etc. DO NOT TRY THIS IF YOU ARE ACCIDENT-PRONE.
WHAT YOU WILL NEED:
==================
- good judgement
- Workspace w/ AMPLE VENTILATION
- "Behlen Nitrocellulose Stringed Instrument Lacquer", from online store called Stewart-Macdonald: (I already researched it via Google Newsgroups - hardcore guitar hobbyists online report good experiences with both this store, and with this product, for producing the finest, mirror-smooth nitrocellulose laquer finish with a bit of flexibility in it)
http://www.stewmac.com/shop/Finishing_supplies/Finishes_and_solvents/Stringed_Instrument_Lacquer.html
- "ColorTone Liquid Pigment for Laquer - Black" (Why? If either plain straight transparent laquer, or lighter-colored laquer, is used to coat the disc, you would not get the high reflectivity of a black-colored laquer. High reflectivity is necessary for easy identification of which parts of a disc have grooves or not, and for visually seeing how smooth or bumpy (quality-grading) the surface is, and how complete the coverage of the disc is.)
http://www.stewmac.com/shop/Finishing_supplies/Colors,_tints,_and_stains/ColorTone_Liquid_Pigments_for_Lacquer.html
- Pure, all-natural Castor Oil, available from online store MotherNature.com: (People online in newsgroups report good experiences ordering from this store. Castor oil is used as a "plasticizer", and is necessary to make the final laquer surface soft enough to cut when the surface dries. This is what was traditionally used in 1930s-40s home & professional laquer recording blanks, according to an article from the ARSC journal detailing chemical composition & restoration techniques for those discs)
http://www.mothernature.com/shop/detail.cfm/sku/85602/S/122406
- Some kind of core material for the blank discs: Use your imagination here. This depends on how good of a workshop you have, and what tools. If you have an arc welder/cutter & have metalworking skills, you can find online or locally & order 1/16" aluminum stock, cut it first down to 12" squares, then punch holes in the centers, make a jig to spin them on the hole & hold the cutting torch a fixed distance, and cut them to near-perfect circles of chosen diameter. At the other end, if all you have is heavy-duty scissors or garden shears, you can order the thick 1/10" (non-corrugated) kind of pressed cardboard stuff they make kiddie "board books" from, the ones where the pages are super-thick cardboard, from places like this online, by doing a Google search for "chipboard":
http://www.dickblick.com/zz131/15/
You could also experiment using the smoother side of 1/8" or 1/4" brown "hardboard" from your local hardware superstore (the stuff they make clipboards out of), or if you feel really gutsy, try using sheets of smooth clear plastic from the same type stores. I assume the plastic would probably be chemically burned & melt from the caustic laquer and result in a toxic puddle of fuming goo, so wouldn't advise it, but it could provide a much cheaper, smoother, and easily cuttable blank material than hardboard or plate metal.
- At least one High-grade professional laquer mastering blank: This is the most expensive part, but would be necessary for reference comparison & tests, to see how good or bad your home-made blanks are: Apollo/Transco's cheapest seems to be their 7-inch blanks, min order of 5 for about $60: As soon as someone continues this research and reports the best ratios for mixing ingredients, this step will no longer be quite as necessary:
http://www.apollomasters.com/products.html#7s
DIRECTIONS:
==========================
STEP 1:
========
Find out the one major missing piece of information in the puzzle: What the proper mixing ration of laquer vs. caster oil should be to produce a recording surface of the same consistency of the industry standard (i.e. an Apollo disc, thus the need for purchasing an Apollo disc for reference). Like I said, I wanted to do this & publish findings, but time won't allow. I've asked professional "acetate" laquer disc collectors and preservationists, and they all tell me, "It was pretty much a secret mixing ratio, and was different for all companies, for example the company AudioDisc which was big in the 1950s and 60s had softer discs than other brands, from using more caster oil". SO, mix up small amounts in small metal or glass containers (i.e. metal spaghetti-sauce-jar lids) of different ratios. Whether to mix by volume or by weight, doesn't make a difference, as long as you're CONSISTENT in your note-taking on your experiments. Then, put thick globs of each mixture at different places on an experimental metal surface, let it dry. When dry, prod the spots with a fingernail, comparing them to the Apollo master, to see which has the most similar softness: Please let the group know your results:
TRIAL 1: 25% castor oil, 75% laquer
TRIAL 2: 10% castor oil, 90% laquer
TRIAL 3: 3% castor oil, 97% laquer
TRIAL 4: 100% laquer
STEP 2:
========
Come up with some way of coating. Instructions on the laquer can may suggest spraying; this may work for wood finishes but seems it could introduce air bubbles, I don't know. Other ideas:
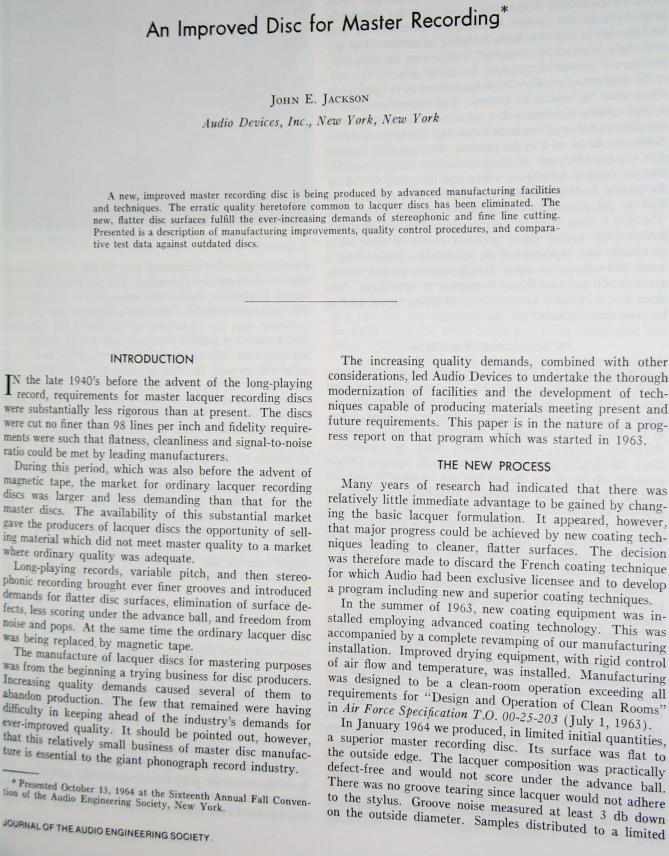
2.1. Build yourself a rig with a supply jug above a faucet, which would pour into a metal or glass pan which is held at an angle (adjustable for perfect evenness), to "sheet coat" the blanks on a motorized (or *very* *steadily* hand-pulled by someone else??) conveyer pathway, like Apollo/Transco does:

2.2. Dipping: Just have a large round shallow dish with the laquer, like the large round aluminum "drip pans" that go under water heaters, sold at hardware superstores. Wearing proper protective gloves of course, dip the blank discs & hang them to dry (flat, not vertical, which would allow it to run off) somehow, as evenly as possible.
2.3. Do it the way I'm guessing the makers of 1930s-40s home recording blanks did it: Rotational dipping:

Affix the core disc to be coated to a SLOWLY ROTATING (i.e. about 16 rpm or so) motor shaft. Have a tall narrow vertical metal or glass container with the laquer mixtire, and vertically dip the rotating disc into the mixture. The disc is now coated on BOTH sides, so the best way to dry would be to allow it to rotate while drying vertically, to prevent the material from running off the disc, because it's constantly rotating. I've seen an old (1940s?) patent for an idea of a large-scale conveyor belt contraption for making laquer blanks like this. I think this is how the old home blanks were made, since they aren't coated with laquer at the center, under the paper label. If you can't dry it on the rotating motor, you could try homehow hanging it flat to dry, but the laquer on the underside may form droplets all over the surface of the disc as it tries to fall off, and result in a very bumpy underside surface, not sure. Maybe you just wouldn't use the underside. Transco seems to get around this by only coating one side, the TOP, of a disc at a time, as mentioned above in step 2.1. (If they even bother with coating the reverse side at all... Personally haven't ordered directly from them before, just a hobbyist.)
STEP 3.
=========
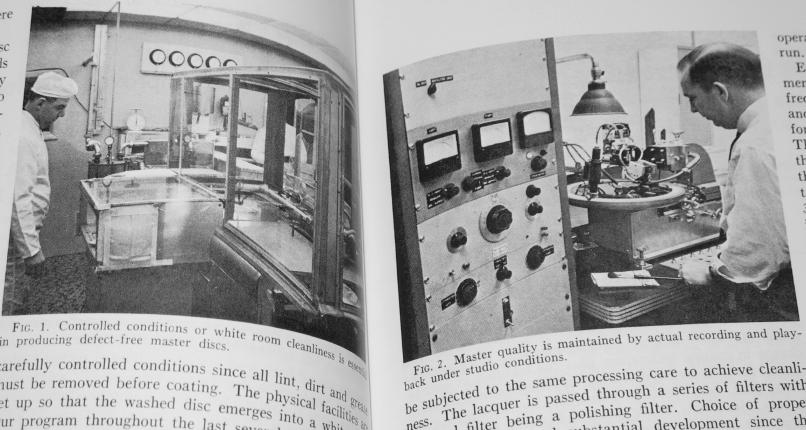
THICKNESS OF COAT: This could be achieved different ways, if the above single-coat procedure isn't thick enough: (Thickness is vital. If not thick enough, the cutting stylus will go through it to the core and be ruined. Stylii are EXPENSIVE; this will make lots of people very mad at you. Must ensure your coat is atleast as thick as some good reference, for instance, an Apollo/Transco reference master disc.)
3.1. Multiple dippings. time consuming.
3.2. Alternate idea: Allowing the laquer mixture to thicken before applying. This is, I think, what Apollo-Transco does, from looking at their YouTube video: their mix looks quite thick. REMEMBER, the vapors are explosive, so allow it to thicken outdoors. I had in mind building some kind of rig specifically for the purpose, that would use a round
shallow metal pan and a "stirring wedge" which goes the diameter of the pan, affixed to a very slowly rotating (five RPM?) motor (with a friction clutch or pulley, so the mixture doesn't thicken enough to halt & burn out the motor). MUST BE CAREFUL to isolate the motor from the flammable vapors, since of course motors spark. Motors of all kinds, powers, and speeds can easily be found for relatively cheap at this place which I've often ordered from for misc projects, SURPLUS CENTER, http://www.surpluscenter.com/
Imagined possible setup, as viewed from outside the drying box:

As viewed from inside the drying box: there should be an "almost air-tight" seal around the motor shaft as it enters the box:

This might be an overkill, I don't know, I'm paranoid about flammable vapor explosions... note the blower to speed up the removal of the laquer fumes (& therefore speed up the thickening). Also note, that the blower motor IS FORCING AIR *IN* AT THE BEGINNING, NOT PULLING IT *OUT* AT THE END! If you pull it out at the end, you're passing concentrated flammable vapors through a sparking fan motor... BAD. Also note, the long airflow piping, which I would gess (??) should be atleast 10 feet from one end to the other, to prevent the flammable vapors from wrapping around back to the entrance blower motor in too higly concentrated form. Also, I am not reccomending this at all, this is just a crazy idea; Don't do this anywhere near any kids; don't asphixiate someone's pet or kill your grass at the fume exit pipe; so use good judgement and don't harm anyone/anything.
You would have to experiment to figure out how long and at what force of airflow the laquer takes to try to the right consistency to provide the corect coating thickness with the disc-coating method of your choice. Also, you need to remember the weather will make a difference (temp & humidity) and may even prevent it from thickening at all in certain conditions; for details on that, read the laquer can.
You also will need a consistent means of measuring viscosity (thickness) of the laquer, so you can take proper notes on required thickening times at certain temperatures and humidity levels in your area. You can find tools on the web for measuring viscosity of liquids. Or, simply measure the seconds it takes for a certain small measured amount, like 1/2 teaspoon, to run a certain distance, say 5 inches, down a 45-degree-angle smooth surface. You need to have a way of assigning some ballpark consistent measurement number to indicate different thicknesses of mix.
Then, you need to try coating discs using mixtures of different thicknesses, numbering the discs, and keeping a record of which of your experimental discs you coated with which thickness of mixture. Then when the discs dry, find the one with the best thickness. Remember, since this kind of home-brew thickening process probably will result in some lumps in your mixture as it thickens unevenly, you may or may not want to improve quality by filtering it through a wire mesh before coating the discs. And you probably should make your coating a bit thicker than a pro disc, maybe twice as thick, to allow for unevenness & imperfections in coating, which may make certain patches thinner - remember, utmost important rule after safety, not to have thin patches that will kill someone's expensive stylus. Especially if using highly abrasive cheaper base materials like chipboard or hardboard.
==================================================================
If anyone actually tries this, remember it's all just a crazy idea which I've never tried, and which I do not advocate you trying. If you do it anyway, Be safe & be honest, and try it at first on a SMALL SCALE; otherwise, consider carefully the huge mess you may be getting yourself into, & whether you feel up to it without breaking environmental codes, releasing large amounts of dangerous fumes in your neighborhood, etc.
If done on a small enough scale, seems it should be fun & not have fumes above the normal amount for, say, a weekend project of refinishing a deck or a piece of furniture.
If you have great success on small scale, rent a warehouse in a local industrial zone, crank out lots of blanks of varying quality grades for varying prices including cheap "hobbyist-grade", and you'll be everyone's hero!
- Bob