-
grooveguy

- Posts: 471
- Joined: Thu Jun 22, 2006 5:49 pm
- Location: Brea, California (a few miles from Disneyland)
- Contact:
Re: Lockdown turntable and lathe - a DIY project
Fantastic, Mark! Forget Corvette Stingray differentials; you guys have proven that slow-stepping works. The DigiKey boards are quite reasonable too.
-
pentlandsound

- Posts: 79
- Joined: Mon May 16, 2011 11:25 am
- Location: Edinburgh, Scotland
Re: Lockdown turntable and lathe - a DIY project
With the rumble problem alleviated, if not entirely eliminated, I spent the last week or so working my way through several dozen polycarbonate blanks in order to carry out some further tests. I tried embossing at a range of downforces, from 35 up to 60 grams; the best results were obtained at 35 - 40 grams, exactly in line with the force recommended by Presto/PIAPTK. Making the force too great causes a kind of squealing sound, audible on recording and playback: I think this is because the stylus is trying to make too deep a groove.
Using barbecue fluid as a lubricator didn't really work; it left a smeary residue which was difficult to clean off. At the moment I'm using ordinary household furniture polish, which seems to work very well.
So on to testing the records I made. My battery of test playback equipment:
The Bush tracked fine until near the end of a side. Around this point, the arm begins to encounter outward pressure from the auto-shut-off mechanism. This primitive arrangement consists of simply a leaf spring, which makes or breaks electrical contact with another depending on the position of a cam fixed to the arm pivot. If the groove is shallow, the force exerted by the spring will cause the arm to jump outwards. This happens on some pressed records as well.
I used the Baird for an extended 'wear test'. I had thought initially that it had been re-fitted with a ceramic cartridge, but when I looked at it properly I discovered that it actually has a BSR X5H crystal cartridge and sapphire stylus, tracking at just under 9 grams. The arm also has a heavy inward bias - if set down on a rotating blank, ungrooved disc, it shoots straight across to the centre pin. I played one sacrificial test record fifteen times. Apart from one unfortunate skate across several windings of the groove - which left that section of the record permanently scarred - the polycarbonate held up much better under the crude, heavyweight pick-up than I thought it might, with only slight distortion evident when played back on the better decks.
Using barbecue fluid as a lubricator didn't really work; it left a smeary residue which was difficult to clean off. At the moment I'm using ordinary household furniture polish, which seems to work very well.
So on to testing the records I made. My battery of test playback equipment:
- KAM DDX-750 DJ turntable (Cheap plastic 'Technics' lookalike, but actually not all that bad)
- Lenco 75 (Shure M75E cartridge)
- Audio Technica Sound Burger (ATN-103 stylus)
- Dual CS-5000 (Ortofon OM cartridge)
- Bush KTS-601 Classic (Terrible Crosley-type 'briefcase portable', total and utter crap, purchased purely for testing!)
- Baird M284 portable (a 'Sixties Crosley' with BSR TU-12 mech, c.1963. Very heavy on records)
The Bush tracked fine until near the end of a side. Around this point, the arm begins to encounter outward pressure from the auto-shut-off mechanism. This primitive arrangement consists of simply a leaf spring, which makes or breaks electrical contact with another depending on the position of a cam fixed to the arm pivot. If the groove is shallow, the force exerted by the spring will cause the arm to jump outwards. This happens on some pressed records as well.
I used the Baird for an extended 'wear test'. I had thought initially that it had been re-fitted with a ceramic cartridge, but when I looked at it properly I discovered that it actually has a BSR X5H crystal cartridge and sapphire stylus, tracking at just under 9 grams. The arm also has a heavy inward bias - if set down on a rotating blank, ungrooved disc, it shoots straight across to the centre pin. I played one sacrificial test record fifteen times. Apart from one unfortunate skate across several windings of the groove - which left that section of the record permanently scarred - the polycarbonate held up much better under the crude, heavyweight pick-up than I thought it might, with only slight distortion evident when played back on the better decks.
-
pentlandsound
- Posts: 79
- Joined: Mon May 16, 2011 11:25 am
- Location: Edinburgh, Scotland
Re: Lockdown turntable and lathe - a DIY project
An update to report that I have had some limited success with stereo embossing. I'm using a PIAPTK sapphire embossing stylus.
I know that attempting to emboss a stereo signal is frowned upon by some because of possible trackability issues; all I can say in response is that my embossed records seem to track just as well whether they are impressed using a mono or stereo signal. I'm still trying to establish what set of conditions must apply in the lathe set-up for the best "stereo" - to be honest it isn't brilliant stereo, but more like a kind of "spaciousness" in the sound. That said, if the recorded disc is then played back with the amplifier switched to mono the difference is apparent.
Some tracks come out better than others. The attached file is an extract from playback of a CD-ROM embossed at 45 rpm. (Fair Use assumed for purposes of demonstration; and yes, I know the track needs some de-essing work!) David
You do not have the required permissions to view the files attached to this post.
-
grooveguy
- Posts: 471
- Joined: Thu Jun 22, 2006 5:49 pm
- Location: Brea, California (a few miles from Disneyland)
- Contact:
Re: Lockdown turntable and lathe - a DIY project
Hey, not bad, David. Could you share embossing particulars, like 'angle of lean,' and whether you use heat and/or lubricant?
I do see what you mean by 'spaciousness,' but the two tracks do seem to sum to mono okay, yet listening selectively to left and right doesn't pick out any distinct differences, and reversing the channels doesn't seem to change the soundstage. Yet a commendable "stereo synthesis" if indeed separation is minimal. Have you tried recording a tone on just one channel to see what separation measures? It could be that some out-of-phase crossfeed between the channels could help this. Keep it up!
I do see what you mean by 'spaciousness,' but the two tracks do seem to sum to mono okay, yet listening selectively to left and right doesn't pick out any distinct differences, and reversing the channels doesn't seem to change the soundstage. Yet a commendable "stereo synthesis" if indeed separation is minimal. Have you tried recording a tone on just one channel to see what separation measures? It could be that some out-of-phase crossfeed between the channels could help this. Keep it up!
-
RussellC23

- Posts: 9
- Joined: Tue Dec 21, 2021 10:56 pm
Re: Lockdown turntable and lathe - a DIY project
Hi there!
I'm getting a 3D printer and a GlowForge soon, (on the way) and was wondering if you're making your plans available for us to try our hand at it.
Really want to cut some discs soon!
RC
I'm getting a 3D printer and a GlowForge soon, (on the way) and was wondering if you're making your plans available for us to try our hand at it.
Really want to cut some discs soon!
RC
-
pentlandsound
- Posts: 79
- Joined: Mon May 16, 2011 11:25 am
- Location: Edinburgh, Scotland
Re: Lockdown turntable and lathe - a DIY project
Right. I've put together a first cut version of some instructions on how to build the lathe described in my earlier posts to this thread. Be aware that these instructions have been compiled some time after the event and are based on my memories of what I did at the time; so please forgive any omissions or inaccuracies.
The instructions relate to the lathe frame, transport and cutter head only. You will need to supply your own turntable deck, amplifier, any signal processing gear etc.
I've also uploaded my original FreeCad files for the dozen or so 3D-printable parts. These have the extension .FCStd, and you will need the FreeCad software to load these and export them to your printable file format of choice, e.g. .STL.
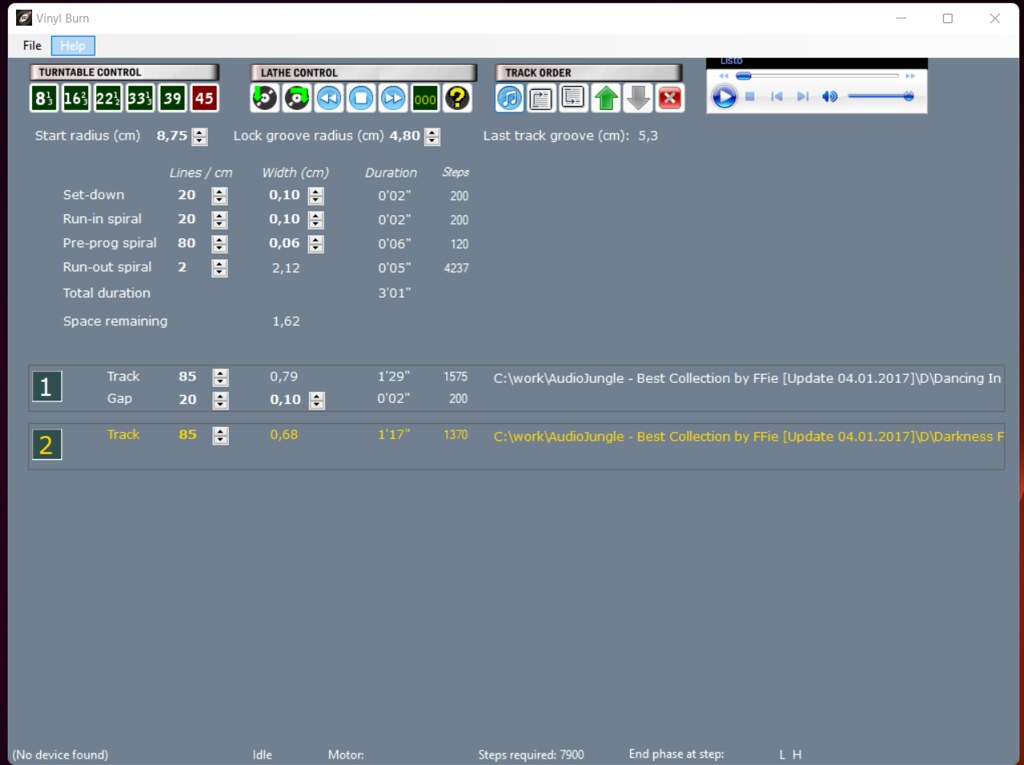
The system I built uses a stepper motor to move the cutter head transport, and this motor is controlled by an Arduino, which is itself harnessed by software ('Vinyl Burn') running on a PC. Vinyl Burn - developed in C# using Visual Studio - enables the user to plan out a record side, listing sound files (.WAV only) to be used, and setting characteristics of the record such as groove pitches, inter-track gaps, run-ins and -outs, playing speed and so on. When the user starts the cutting process, Vinyl Burn plays each of the sound files in turn through the PC's sound card, while sending signals via USB to the Arduino to control the cutter head motor speed.
'Vinyl Burn' and the associated Arduino sketch are more than likely to need some rewriting to reflect your own system's hardware, logic etc. Specifically, the Arduino software, as it stands, caters for a small LCD readout (interfaced via a 74HC595 register), two photo-interrupter limit switch circuits, the stepper motor driver itself (TMC 2208) and an optional thermistor circuit. I've included these two sets of software really as a possible starting point for your own project.
All software released under GPL 3.0, instructions document under Creative Commons 4.0.
I'll try to answer any queries, either via PM or in this thread.
Instructions, FreeCad files and Arduino sketch: https://github.com/dn784533/lathe_guide
Vinyl Burn: https://github.com/dn784533/vinyl_burn
Good luck!
David
The instructions relate to the lathe frame, transport and cutter head only. You will need to supply your own turntable deck, amplifier, any signal processing gear etc.
I've also uploaded my original FreeCad files for the dozen or so 3D-printable parts. These have the extension .FCStd, and you will need the FreeCad software to load these and export them to your printable file format of choice, e.g. .STL.
The system I built uses a stepper motor to move the cutter head transport, and this motor is controlled by an Arduino, which is itself harnessed by software ('Vinyl Burn') running on a PC. Vinyl Burn - developed in C# using Visual Studio - enables the user to plan out a record side, listing sound files (.WAV only) to be used, and setting characteristics of the record such as groove pitches, inter-track gaps, run-ins and -outs, playing speed and so on. When the user starts the cutting process, Vinyl Burn plays each of the sound files in turn through the PC's sound card, while sending signals via USB to the Arduino to control the cutter head motor speed.
'Vinyl Burn' and the associated Arduino sketch are more than likely to need some rewriting to reflect your own system's hardware, logic etc. Specifically, the Arduino software, as it stands, caters for a small LCD readout (interfaced via a 74HC595 register), two photo-interrupter limit switch circuits, the stepper motor driver itself (TMC 2208) and an optional thermistor circuit. I've included these two sets of software really as a possible starting point for your own project.
All software released under GPL 3.0, instructions document under Creative Commons 4.0.
I'll try to answer any queries, either via PM or in this thread.
Instructions, FreeCad files and Arduino sketch: https://github.com/dn784533/lathe_guide
Vinyl Burn: https://github.com/dn784533/vinyl_burn
Good luck!
David
-
RussellC23
- Posts: 9
- Joined: Tue Dec 21, 2021 10:56 pm
Re: Lockdown turntable and lathe - a DIY project
Thanks! I'll keep you posted with my progress!
I have FreeCad so that's great!
Russell
I have FreeCad so that's great!
Russell
-
RussellC23
- Posts: 9
- Joined: Tue Dec 21, 2021 10:56 pm
Re: Lockdown turntable and lathe - a DIY project
Quick Question on 3D Printing.
What settings do you use for your parts?
What type of filament do you use?
Are the parts completely solid?
Best,
Russell
What settings do you use for your parts?
What type of filament do you use?
Are the parts completely solid?
Best,
Russell
-
pentlandsound
- Posts: 79
- Joined: Mon May 16, 2011 11:25 am
- Location: Edinburgh, Scotland
Re: Lockdown turntable and lathe - a DIY project
Hi,
I had the parts made by the online company i.materialise.com. You upload your STL files to their website, which checks them for any potential problems such as walls that are too thin. Once everything has been OK'd you can submit the order. It may take several weeks for the order to be printed and sent to you. Quality is excellent.
The parts were printed by laser-sintering using 'alumide': https://i.materialise.com/en/3d-printing-materials/alumide
Regards, David
-
kugelblitz

- Posts: 50
- Joined: Thu Oct 07, 2021 6:16 am
- Contact:
Re: Lockdown turntable and lathe - a DIY project
Just wanted to say this is a massive and very generous share. The nearest thing to a lathe in kit from I've seen on here.pentlandsound wrote: ↑Wed Mar 16, 2022 4:04 pmsome instructions on how to build the lathe described in my earlier posts to this thread.
I'm sure loads of people will build on this in years to come.
so thanks
-
ill.logic.inc
- Posts: 1
- Joined: Sun May 01, 2022 4:31 am
Re: Lockdown turntable and lathe - a DIY project
I am beyond impressed by not just this project, but the comraderie of this forum and the wealth of knowledge here. I am new to all of this and basically going to be absorbing as much information and knowledge as possible. This enginuity right here is nothing shy of genious!
~ Life's a gamble so go all in! ~

Re: Lockdown turntable and lathe - a DIY project
yeah David, big thanks on this thread.
I took your advice on FreeCad and Materialise to make a caruso to VR adapter.
I'll report back when it shows up!
I took your advice on FreeCad and Materialise to make a caruso to VR adapter.
I'll report back when it shows up!
making lathe cuts on a Presto 6N, HIFI stereo cuts on vinylrecorder
at Audio Geography Studios, Providence, RI USA
http://www.audiogeography.com
at Audio Geography Studios, Providence, RI USA
http://www.audiogeography.com
-
inspector77

- Posts: 78
- Joined: Mon Nov 17, 2014 10:59 am
- Location: Málaga - Spain
- Contact:
Re: Lockdown turntable and lathe - a DIY project
This is a huge project, which involves a lot of time and knowledge of electronics, programming and mechanics, thank you very much for sharing it.
-
inspector77
- Posts: 78
- Joined: Mon Nov 17, 2014 10:59 am
- Location: Málaga - Spain
- Contact:
Re: Lockdown turntable and lathe - a DIY project
Hello David, I have started to build this project and I have started with the electrical part. I already bought the arduino one, the TCM2208 driver, and step motor. I have a question. Does the nema 14 step motor feed directly from the arduino or does it have a separate power supply?
Thanks
Thanks
-
pentlandsound
- Posts: 79
- Joined: Mon May 16, 2011 11:25 am
- Location: Edinburgh, Scotland
Re: Lockdown turntable and lathe - a DIY project
Hi,
Don't attempt to power any motor directly from the Arduino output pins! You'll need to power the motor from a separate D.C. supply, which should be connected to the VMOT (or VM) and GND pins on the TMC2208 unit. See https://wiki.fysetc.com/TMC2208/. For the motor I have, I found that 10 V works fine. The four leads to the motor connect to the four outputs on the TMC2208, on the same edge as VMOT/GND. Also on this edge are the VIO and GND pins for the logic power supply (5 V). Voltage 'buck' converters to drop 12 V or so down to 5 for the TMC2208 logic/Arduino can be found cheaply on eBay.
Before running your motor, you'll need also to set 'VREF' on the TMC2208 to avoid over-current and possible damage to driver or motor. See https://all3dp.com/2/vref-calculator-tmc2209-tmc2208-a4988/ for information on how to do this.
David
-
inspector77
- Posts: 78
- Joined: Mon Nov 17, 2014 10:59 am
- Location: Málaga - Spain
- Contact:
Re: Lockdown turntable and lathe - a DIY project
Great, thanks a lot for the information.
-
inspector77
- Posts: 78
- Joined: Mon Nov 17, 2014 10:59 am
- Location: Málaga - Spain
- Contact:
Re: Lockdown turntable and lathe - a DIY project
Some progress this weekend, 3d printed on an ender 3 v2, attached .stl and .gcode files for reference
https://drive.google.com/drive/folders/155ahObO2Uf4BSHs89NWolO17SiiT1Aut?usp=sharing


https://drive.google.com/drive/folders/155ahObO2Uf4BSHs89NWolO17SiiT1Aut?usp=sharing
-
pentlandsound
- Posts: 79
- Joined: Mon May 16, 2011 11:25 am
- Location: Edinburgh, Scotland
Re: Lockdown turntable and lathe - a DIY project
Thanks for photographing these - the print quality looks great! The Creality Ender 3 v2 comes in at about GBP 200 / USD 300 or so online; I didn't know that such a (comparatively) inexpensive machine could produce output of this quality. Something I'll have to investigate, I think!
-
inspector77
- Posts: 78
- Joined: Mon Nov 17, 2014 10:59 am
- Location: Málaga - Spain
- Contact:
Re: Lockdown turntable and lathe - a DIY project
I have used the default preset (Low quality), this printer can make parts of much higher resolution, they have advanced a lot in recent years.
This weekend I have managed to spin a nema 17 motor with the arduino, I have also compiled the VinylBurn software, I am advancing little by little and learning a lot.
Regards
This weekend I have managed to spin a nema 17 motor with the arduino, I have also compiled the VinylBurn software, I am advancing little by little and learning a lot.
Regards
-
inspector77
- Posts: 78
- Joined: Mon Nov 17, 2014 10:59 am
- Location: Málaga - Spain
- Contact: